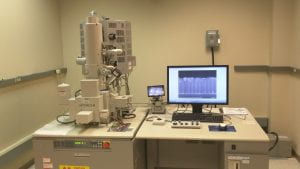
The SU8010 Ultra-High Resolution (1.0nm) Scanning Electron Microscope FE-SEM has excellent imaging performance for the wide variety of demanding high-resolution applications in material research.
The SU8010 has a very unique model of “Deceleration” for the non-conductive sample.
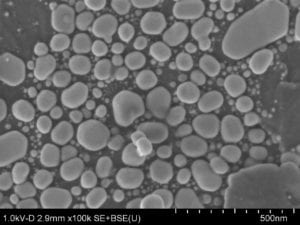
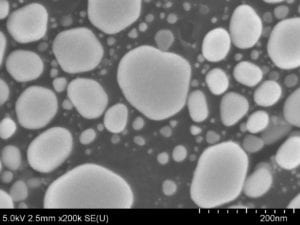
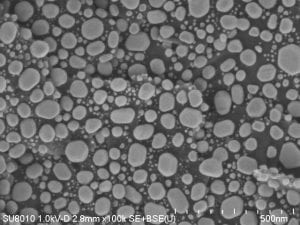
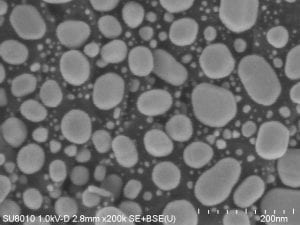
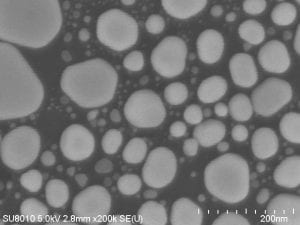
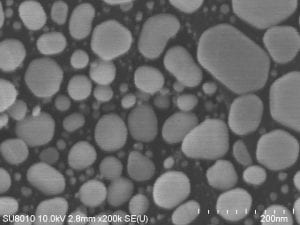
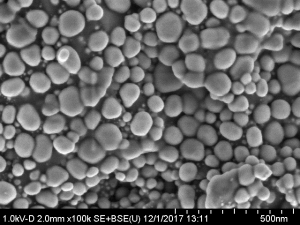
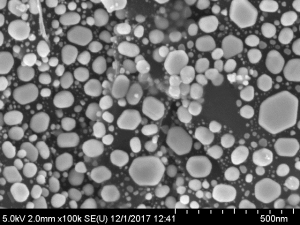
A stunning low-kV resolution of just 1.3 nm can be achieved at a landing voltage of 1 kV by applying Hitachi’s beam deceleration technology. In this mode, a negative bias voltage is applied to the sample stage, thereby slowing down the primary electron beam to the desired landing energy.
The gain in effective resolution can be estimated from a comparison of two images: an image of the sample observed with the conventional mode (left), and an image of the same sample observed again under beam deceleration mode. The effective use of this mode offers superior image quality even down to the lowest energy level of just 100 eV.
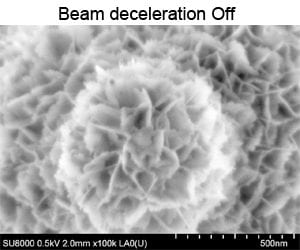
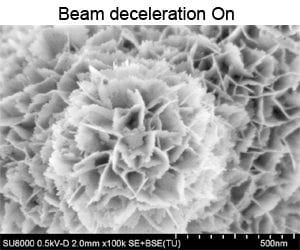
Accelerating Voltage : 500 V , Magnification : 100kx Landing Voltage : 500 V, Magnification : 100kx
If you would like training on the SU8010 and have a GTLogin; click HERE and click on the request training button.
[expand title = “Performance Check Results:“]
January 2020
|
|
|
|
 |
August 2017
|
|
|
|
|
|
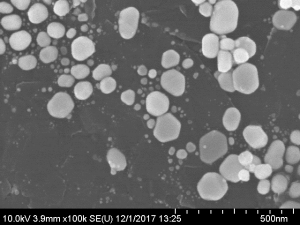
December 2017
|
|
|
|
[/expand]
Instructions:
- Log into SUMS and also the paper log sheet.
- Wear gloves while handling components to be inserted into the vacuum system: sample, mounts and holders
- Attach the specimen to the specimen mount, using conductive adhesive tape or paste.
- Place the specimen mount into the appropriate specimen holder (single, quad, or multi).
- Check the height of the specimen and stage, using the height gauge, and adjust if needed.
- Check that the specimen stage in the chamber is at the “Home” position.
- Check that the accelerating voltage is OFF.
Inserting the Specimen
- Select the AIR button of the specimen exchange control switch. An alarm will sound indicating that the chamber is vented.
- Open the exchange chamber door and then connect the specimen holder to the specimen exchange rod.
- Rotate the rod to the LOCK position.
- Pull out the specimen exchange rod completely to the back of the specimen exchange chamber, until it clicks, and close the exchange chamber.
- Press EVAC. Wait for the light on the EVAC button to glow steady.
- Open the exchange chamber door, by pressing OPEN.
- Look inside the specimen chamber, as you are pushing the rod and sample holder into the main chamber. Place the specimen holder onto the specimen stage by sliding the specimen holder along the guide rails. Push far enough to activate the blue XC button, visible outside the chamber.
- Turn the specimen exchange rod clockwise so that the UNLOCK mark is pointed upwards. Pull back on the rod, to remove it completely.
- Press the CLOSE button of the specimen exchange control panel and an alarm will sound when the specimen exchange door is closed.
- Select the Home icon to move the specimen stage to the home position.
- Set the specimen holder diameter and the height in the Stage tab.
- Click the HV and emission current window. The HV control dialog window will open.
- Select the observation conditions: HV, emission current, detector.
- If prompted that Flashing is needed, confirm that the flash intensity is 2 and select the Execute button.
- After the filament has reached the proper accelerating voltage, ABC can be used to automatically adjust the brightness and the contrast of the image.
- Perform column alignment.
- Select a suitable mag and focus the image using the COARSE focus knob.
- Adjust the beam properties, following the Alignment guide.
- Prior to capturing an image, verify the image quality using the Slow scanning speed. Click the Capture button to capture an image.
- To save the captured image, click the Save button.
- To select the folder for saving the image press the “select” button. Choose the storage location and enter the file name.
Removing the Specimen
- Click the HV OFF button in the control panel.
- Move the specimen stage to the “Home” position.
- Remove the specimen:
- a) Push the OPEN button of the specimen exchange control switch and alarm will sound when the specimen exchange door is open
- b) Rotate the specimen exchange rod clock wise so that the UNLOCK marking is pointed upwards. Look into the specimen chamber, insert the exchange rod until the exchange rod in positioned onto the specimen holder. The blue XC light will glow.
- c) Rotate the exchange rod counterclockwise so that the lock marking is pointed upwards. Look into the specimen chamber and remove the specimen exchange rod. Pull all the way out, until the rod clicks into place.
- d) Push the CLOSE button on the specimen exchange control panel and an alarm will sound once the specimen exchange door is closed. Select the AIR button to vent the specimen exchange chamber.
- e) Open the exchange chamber door and then push the specimen exchange rod for ward while holding onto the chamber door.
- f) Rotate the specimen exchange rod clockwise so that the UNLOCK is pointed upwards. The specimen with holder may now be retrieved.
Shut-down Procedure
Check that the EVAC button of the specimen exchange control is activated. Leave the chamber under vacuum.
Copy your files onto a flash drive.
Log out on the log sheet and SUMS.